
I review laptops for a living, and these are the settings I change on every device

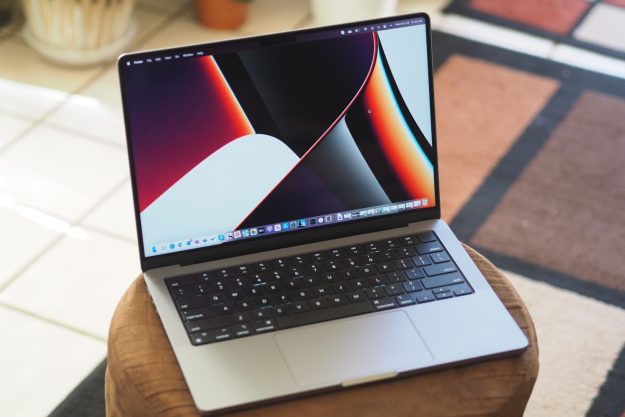
I’ve reviewed nearly all of the best laptops, and when I get my hands on a new one, I instinctively adjust some settings to ensure that I’m meeting a standard configuration. I need to make sure every laptop is set up the same way, as closely as possible, to ensure my benchmarks and testing are consistent. While those settings aren’t relevant for most users, the process has given me some insight into how various settings impact day-to-day use.

So, when I start using a laptop for real work, I have a core group of settings that I change to fit my workflow. I’ll outline those here, for both Windows 11 and MacOS. It’s not a one-size-fits-all scenario, but hopefully, some of these changes will make your computing more efficient and enjoyable.

Start with power management

In Windows 11, the first place I go in the Settings app is System and then Power & battery. Windows defaults to a very short screen-on time for both battery use and when plugged in, and I adjust those in Screen and sleep to an hour and three hours, respectively, for turning off the screen and putting the laptop to sleep. If you’d rather your screen turn off, but the laptop remain awake, then adjust accordingly. And, my times may not work for you. I don’t often keep my laptops sitting there with the display open, and they go to sleep when I close the lid.

Windows 11 screenshot showing power settings.
Mark Coppock / Digital Trends

I set the Power mode to “Balanced,” because most laptops I use come with a utility that enables various power modes that are optimized for that laptop. HP has its Command Center utility, for example, while some other manufacturers bury the setting in their generic utilities. Some Lenovo laptops integrate with the Windows power mode setting instead. I typically run in a laptop’s “balanced” mode, whatever it’s called, and only switch to “performance” mode when I need that extra boost of speed. But you’ll want to become familiar with your laptop’s utility to get the best mix of battery life, heat and noise, and performance. It can make a huge difference, especially with gaming laptops.

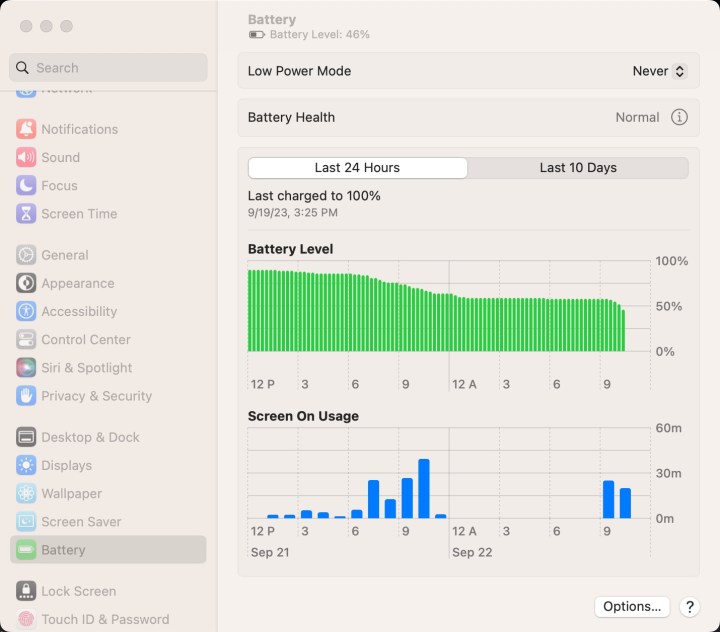
On my MacBook Pro 14, I haven’t made many power adjustments. I open the Systems settings app and select Battery from the left-hand column, and then make sure Low power mode is set to Never. I don’t run a lot of demanding apps while on battery, and so I want the MacBook to always run at full speed. Another change I make is to go into Options… and toggle off Optimize video streaming while on battery. I want full-quality HDR video both when on battery and plugged in. Otherwise, I maintain the MacOS defaults, which work well for me.

MacOS screenshot showing power settings.
Mark Coppock / Digital Trends

Adjust the display for optimal performance

Modern laptops have excellent displays, by and large, whether they use IPS technology that’s great for productivity or OLED and Mini-LED panels that creators and media consumers will love. I’m partial to high resolutions and displays that do a great job of displaying high dynamic range (HDR) content, so I gravitate toward the latter. In any event, there are a few settings you’ll want to check out to make sure you’re optimizing your display’s performance.

In Windows 11, I head to Settings > System > Display. Once there, I check to see if there’s an option to automatically adjust brightness when lighting changes. If there is, I uncheck the box. I like to manually control brightness. The next setting I check is the display’s Scale. The right scaling percentage depends on the size of the display and its resolution. I’ll check a few options to see which produces icons and text that aren’t too tiny, but that allows me to see the most elements on-screen at once. It’s a balancing act that sometimes takes me a few tries to get right. On newer laptops with high refresh rates, I’ll select Advanced display and then Choose a refresh rate. While selecting a higher refresh rate, say 120Hz, uses more battery life, it makes the user interface much smoother. And if you’re a gamer, it’s key to ensuring tear-free gaming.

Windows 11 screenshot showing display settings.
Mark Coppock / Digital Trends

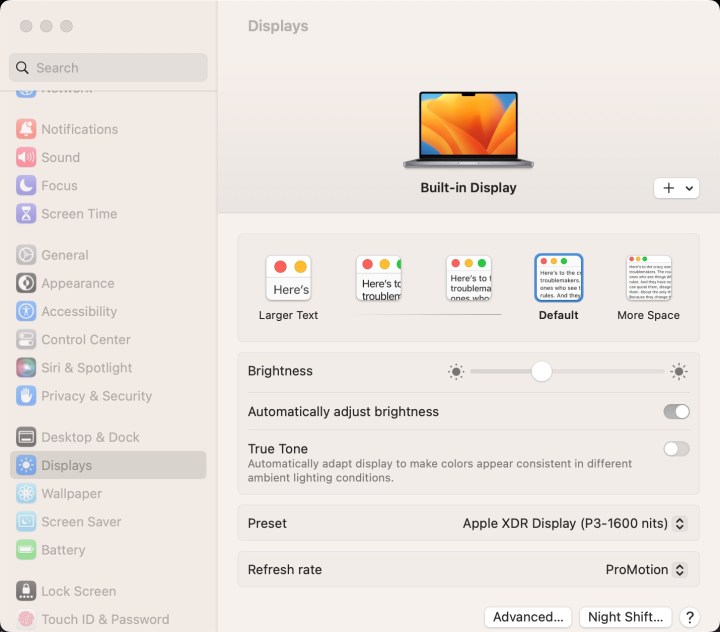
On my MacBook, I head into the System Settings app and select Displays. I don’t change the scaling, as the default works perfectly for me. I toggle off Automatically adjust brightness, make sure the Refresh rate is set on “ProMotion” (which adjusts the display dynamically up to 120Hz), and make sure that the Preset is on Apple XDR Display (P3-1600 nits). I want the brightest display when I’m playing HDR video, which is something that no laptop does as well as the latest MacBook Pro Mini-LED displays. Next, I click Advanced… and toggled off Slightly dim the display on battery. I also toggle on the options to use a Mac or an iPad as a second display, to accommodate my iPad Pro 11.

MacOS screenshot showing display settings.
Mark Coppock / Digital Trends

Windows 11 makes color adjustments a bit tougher. You can search for Color Management and open the Control Panel option if you want to apply a custom color profile to your display. These ICC profiles aren’t common, so you’ll generally need a consumer colorimeter like Datacolor’s SpyderX to generate a custom color profile.

Make your touchpad work for you

I don’t make any keyboard adjustments in either Windows 11 or MacOS, but I do check and adjust the touchpad configuration. The touchpad is the primary way I interact with my laptops, as is the case with most people, and while I use the touch display and an external mouse on occasion, getting the touchpad settings just right is vital.

In Windows 11, that means going to Settings > Bluetooth and devices > Touchpad. Once there, I first adjust the Cursor speed to whatever’s most comfortable on a given laptop. I make sure that Taps is enabled for all combinations and that Touchpad sensitivity is set to Medium sensitivity. Then, I set Scrolling direction to Down motion scrolls up, which feels more natural to me.

Windows 11 screenshot showing touchpad settings.
Mark Coppock / Digital Trends

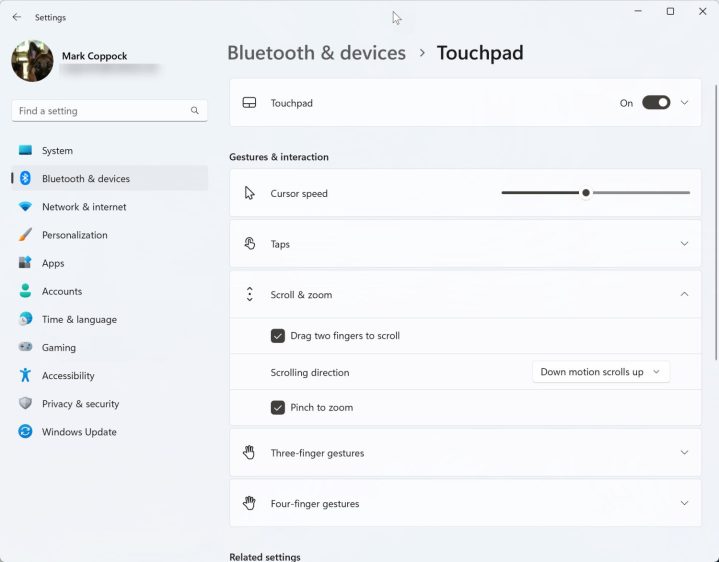
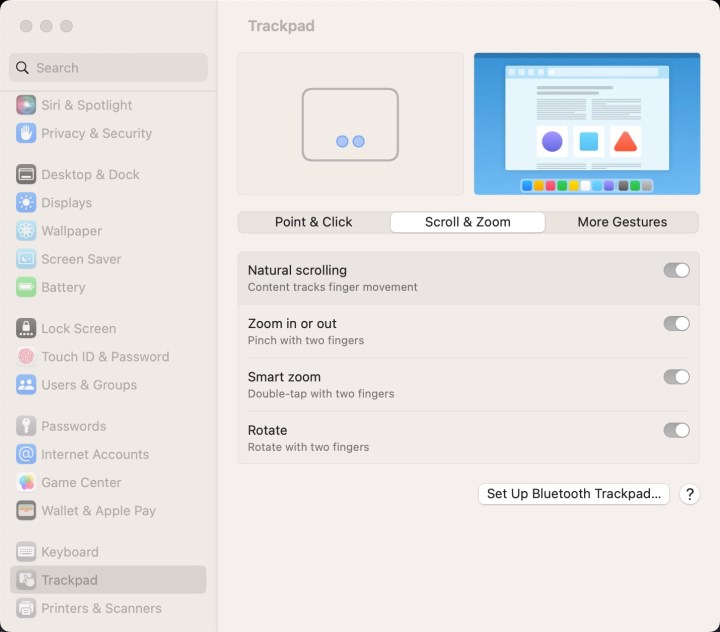
On my MacBook, I open the System Settings app and click on Trackpad. Under Point & Click, I adjust the Tracking speed and Click settings to make for a precise response from the Force Touch touchpad. I also turn on Tap to click. Under Scroll & Zoom, I toggle Natural scrolling to on, matching the behavior on my Windows laptops. There are a number of other settings to adjust, but I am happy with the way the touchpad performs with the other default settings enabled.

MacOS screenshot showing trackpad settings.
Mark Coppock / Digital Trends

Miscellanea

There are a few other changes I make to both my Windows 11 laptops and my MacBook. I change the notifications settings to enable them for just the apps I want. In Windows, you’ll find the settings in Settings > System > Notifications. On the MacBook, they’re in the Settings app, then Notifications.

One of the first configuration options I make sure is set correctly is the time zone. In Windows, go to Settings > Time & language > Date & time, and then toggle on Set time zone automatically. There’s a Sync now button you may need to select here if your time is incorrect. In MacOS, open the System Settings app, then select General > Date & Time. Make sure Set time zone automatically using your current location is toggled on.

Finally, I like updates to be applied automatically, which might put me in a minority. Yes, sometimes a laptop will update at an inconvenient time, but I don’t like the idea of missing important security updates. So, in Windows 11, I head to Settings > Windows Update, then I toggle on Get the latest updates as soon as they’re available. That applies to non-security updates, but I still turn it on just in case. In MacOS, the setting is in the System Settings app, then General, then Software Update. Click on the information icon next to Automatic updates and you’ll see several options. I toggle all of them on.

Sometimes, especially in Windows, updates don’t work out. Youcan go to Settings > Windows update> Uninstall updates to see your most recently installed updates and remove them.

More from there

There are dozens of additional settings in Windows 11 and macOS, but adjusting your power, screen, and touchpad settings should set your laptop up right. From there, it’s a matter of personalization, adjusting things like your wallpaper and color settings.

All of this assumes your laptop is working how you want it to, though. If you’re running into problems, make sure to check out our roundups of common Windows 11 problems and common macOS Ventura problems.

Editors' Recommendations

Mark Coppock
Mark has been a geek since MS-DOS gave way to Windows and the PalmPilot was a thing. He’s translated his love for…
Why my favorite laptop to use in 2022 wasn’t even from this year
An Apple MacBook Pro 14 sits open on a table.

I reviewed 59 laptops in 2022, ranging from low-end Chromebooks to extremely high-end creative powerhouses. Some of them were the best laptops I've ever used, and I observed that laptops this year represented a legitimate increase in both quality and value. Simply put, laptops got a lot better in 2022, making it a great time to purchase.

Weirdly enough, though, as I look back and pick the laptop that impressed me the most, it wasn't introduced in 2022. Nope. It was introduced in October 2021, and that laptop is the Apple MacBook Pro 14.

Read more
I hate how much I love my MacBook Pro
Apple MacBook Pro 14 front view showing display and keyboard deck.

I've been a Windows user since Windows 1.0 hit the streets. In that time, I've also reviewed more than 200 laptops, the vast majority running Windows.

And outside of a brief diversion to escape the pain of Windows Vista, I've never found much reason to want to secede to a Mac.

Read more
If the Mac gets a Dynamic Island, I’m not sure I want it
A mockup of a MacBook Pro with an iPhone-style Dynamic Island replacing the menu bar at the top of the screen.

The Dynamic Island was one of the standout features at Apple’s iPhone 14 launch event in September, and it contained just enough classic Apple magic to wow audiences tuning in. But it left us wondering -- how would it look on a Mac?

Now, we have an answer thanks to Reddit user DavidGamingHDR, who posted a mocked-up render of the Dynamic Island adorning a MacBook Pro to the r/Mac sub-reddit. And now that we’ve seen it, we’re intrigued -- and a little concerned.

Read more